Papercut is MCC's managed print environment and you can print from your personal device, and virtually any major operating system and device type.
Prerequisites to use Papercut
- Your device must be connected to MCC-Wireless
- You will need your UserID (E######## or S#######) and password
- This will use the “MCC Find Me” secure print queue, which requires users to release their print job at any printer either via badge swipe, UserID and password, or Papercut PIN.
Go to setup
- Regardless of device type or OS, you will start by opening this link: mcc-papercut-01:9163/setup
- The Papercut system will automatically detect the operating system you are using when
browsing to this site, but if it doesn't detect the OS correctly, you can choose your
Operating System by clicking on the corresponding icon at the bottom of the page.
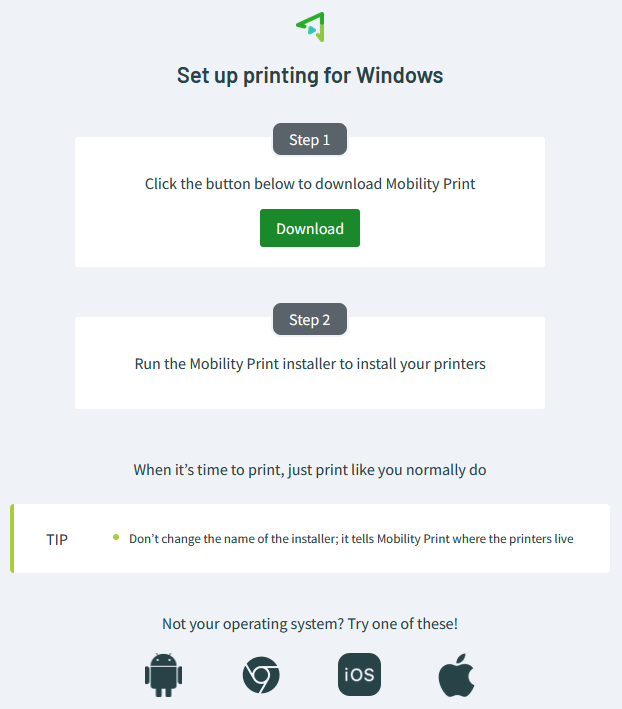
For Windows Users
- Download/install Mobility Print installer by clicking on the Download button (run the downloaded file when complete if the installer doesn't launch automatically). Here is a direct link to the Windows installer.
- Select MCC Find Me (mcc-papercut-01) as printer
- When prompted, enter your userID (E######## or S#######) and password.
- Print your item, choosing the “MCC Find Me” printer and release print job at printer.
View video on how to print from a Windows device.
For MacOS Users
- Start out at mcc-papercut-01:9163/setup, which should automatically bring you to the MacOS specific page. You can also go directly to the MacOS specific page.
- Go to your downloads folder, locate and double-click on the downloaded disk image file to mount it.
- Retain original editable source files.
- Once the installer starts, click Continue, then continue again, then click Agree when prompted.
- Next, click install and then enter your Mac administrator password when prompted and hit the install software button. The installation process will continue for a few moments.
- In the select printers dialog box, select the MCC Find Me Printer and click OK. You should get a message that the printer was successfully installed, click OK.
- Now you can click Close to exit the Installer program. Close any remaining windows from the installation process and now you are ready to use the MCC Find Me Printer from your personal Mac device!
- To print from your Mac, just print like you would normally, and select the MCC Find Me printer. Note that you will be prompted to enter your userID (E######## or S#######) and password.
View video on how to print from a macOS device. The video will automatically start at the 48 second mark, and show you how to print once you've completed the one-time setup for Mobility Print above.
Printing from iOS (iPhone or iPad)
- Start out at mcc-papercut-01:9163/setup, which should automatically bring you to the MacOS specific page. You can also go directly to the iOS specific page.
- Click on the green download button, and choose “Allow” when prompted.
- Tap on the green download button and choose "Allow" when prompted in the pop-up. Click close when you get the message that the profile was downloaded.
- Next, you will go to your iOS settings, tap General, then scroll down until you see the entry for VPN & Device Management.
- Tap on that item and choose the PaperCut Mobility Print profile to open it. Once it is open, tap "install".
- Enter your device passcode when prompted, then tap install at the pop-up.
- Tap on the blue check-mark in the upper right once it appears to complete the process. You are now ready to print to the MCC Find Me Print Queue from your iOS device!
- To print from your iOS device, just print like you would normally, and select the MCC Find Me printer. Note that you will be prompted to enter your userID (E######## or S#######) and password.
View video on how to print from a iOS device. The video will automatically start at the 48 second mark, and show you how to print once you've completed the one-time setup for Mobility Print above.